Microsoft SDS: Difference between revisions
| Line 8: | Line 8: | ||
[[UMS]] | [[UMS]] | ||
Organization | [[Organization]] | ||
== Installation == | == Installation == | ||
Revision as of 11:40, 17 October 2018
Go to this page and login with the credentials of the tenant you want to setup SDS for.
Prerequisites
Module requirements
Installation
Dashboard
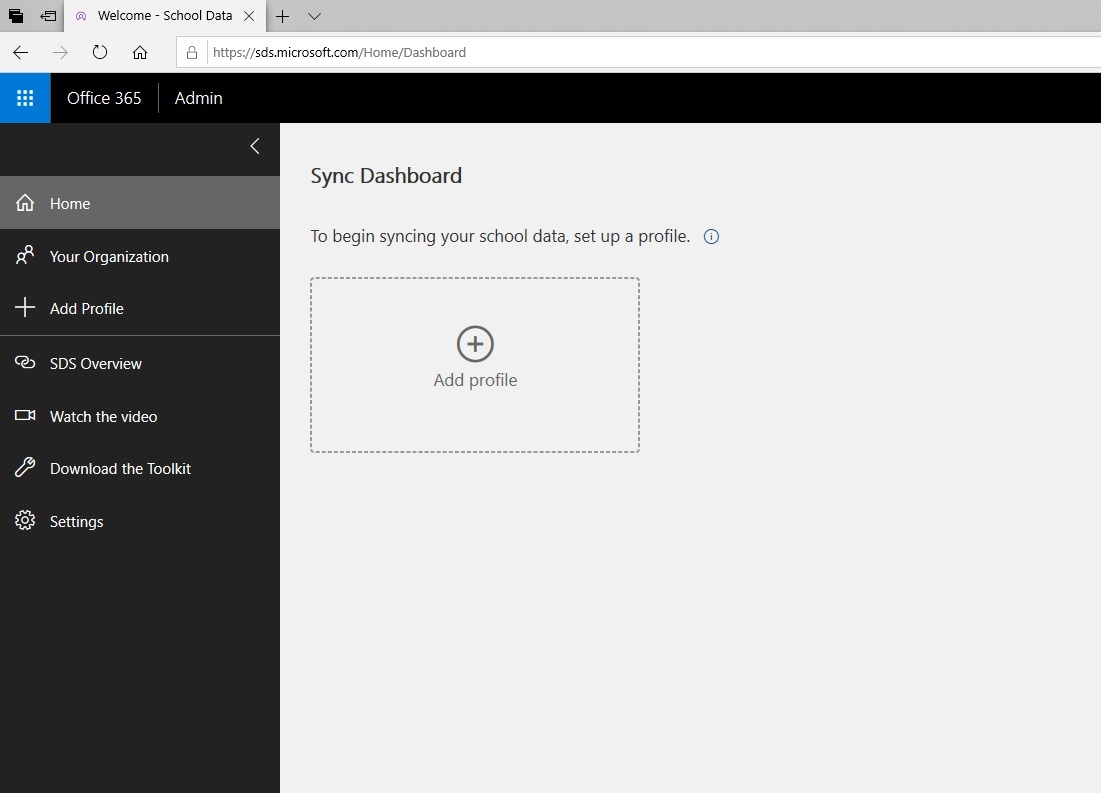
Click Add Profile
Choose connection type
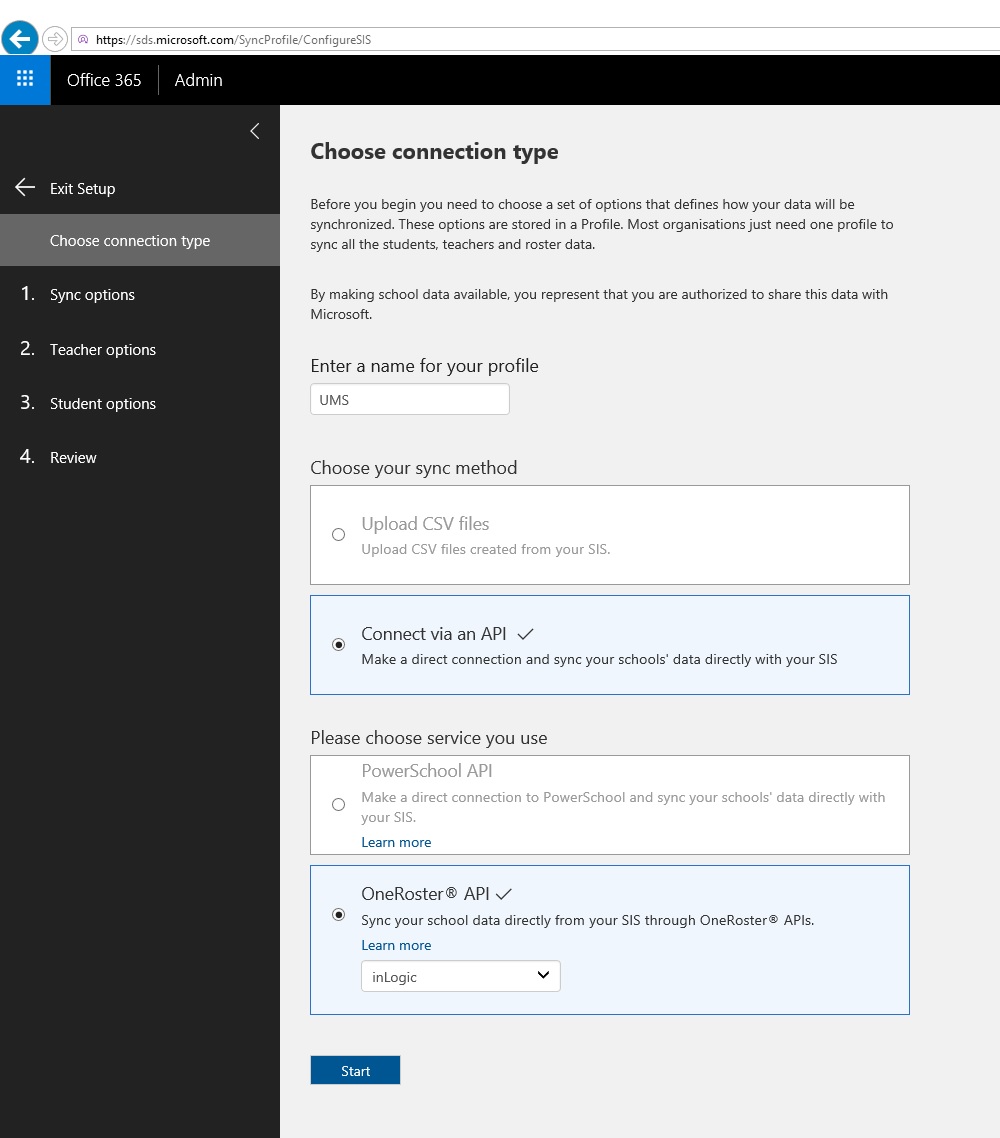
Choose settings as shown above.
Step 1: Sync options
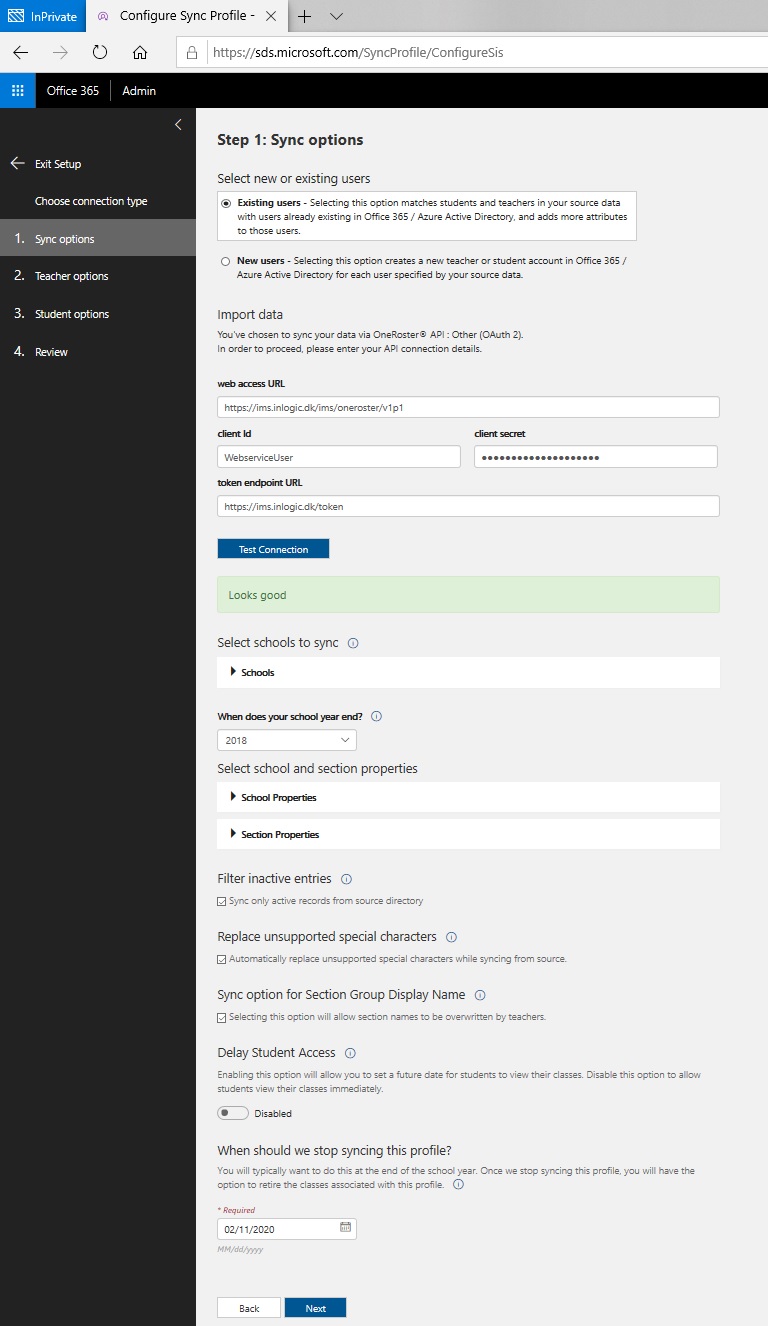
web access URL
The URL needs to be updated to the URL of the schools UMS SDS web installation.
You have to click Test Connection and it needs to be successful otherwise the next button won't be available
token endpoint URL
The URL needs to be updated to the URL of the schools UMS SDS web installation.
When does your school year end
This has no meaning in a UMS synchronization so set it to the current year.
Replace unsupported special characters
Enable this.
When should we stop syncing this profile
It is not possible to set a date that never expires. This means that this has to be updated every year to the highest possible date.
Step 2: Teacher options
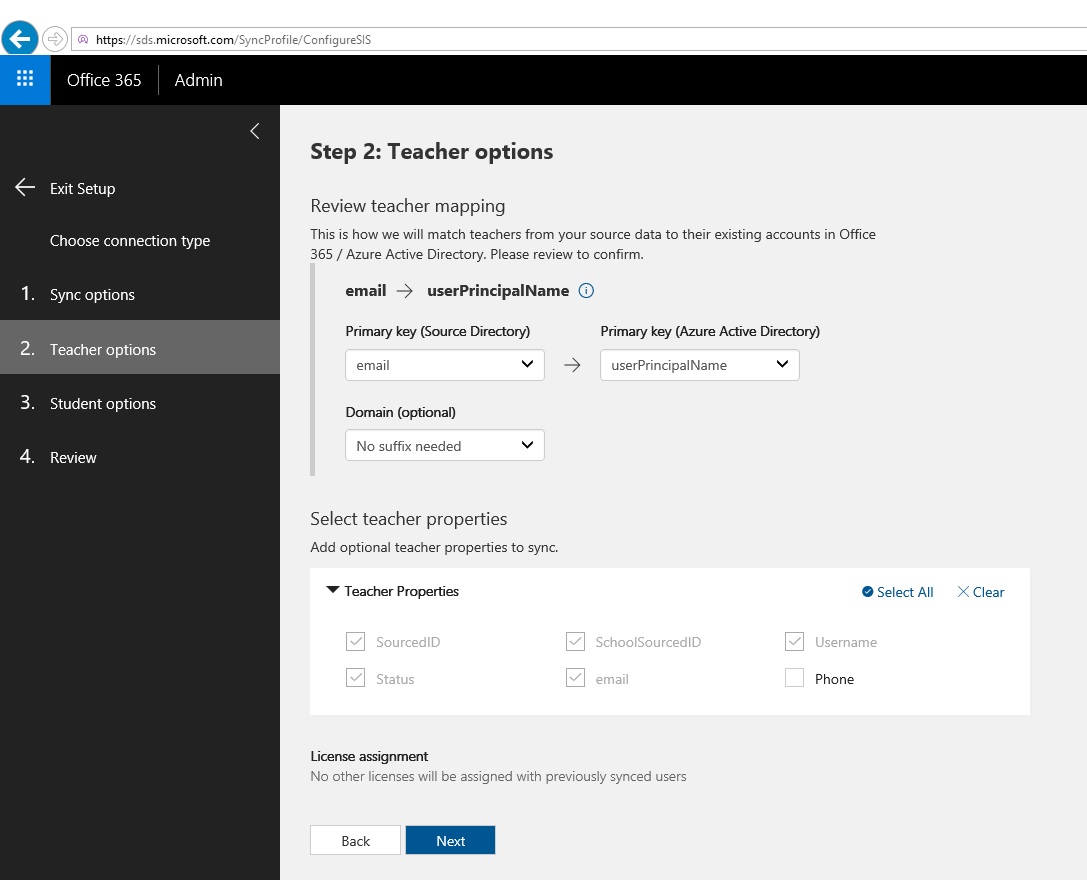
Teacher mapping
You need to set the domain.
Teacher properties
Expand and check email.
Step 3: Student options

Student mapping
You need to set the domain.
Student properties
Expand and check email.
Step 4: Review
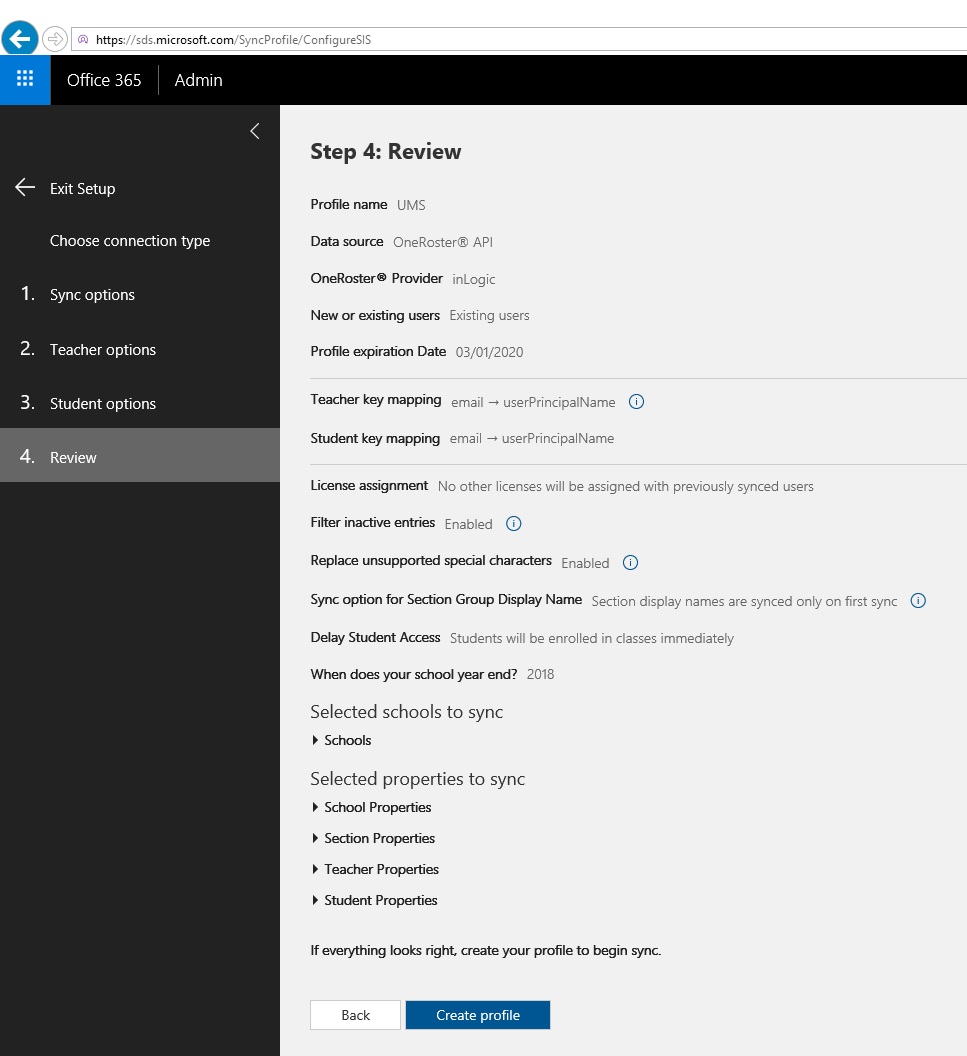
This end result should look similar to this.
Except for the Profile expiration Date and When does your school year end
FAQ
More info here https://docs.microsoft.com/en-us/schooldatasync/how-to-deploy-school-data-sync-by-using-powerschool-sync