UMS Photo
UMS Photo is a photo solution for schools and educational institutions that use UMS. UMS Photo makes it easy to always have updated photos of students and employees.
Everything is managed through UMS, and is easy, fast and intuitive.
UMS Photo allows users to update their student pictures from mobile device (MEA APP) or webcam (UMS Web).
When the picture has been uploaded to UMS, it will enable an approval process, the approval process can be "human" or "automatic".
Prerequisites
Module requirements
Installation
To set up UMS Photo, go to Web setup in the Configurator.
Setting UMS Photo :
- "Save pictures with SSN" - Automatic saving uploaded pictures with SSN as filename. (not recommended)
- "Auto approve photos" - Automatic approval discards the manual approval process. (uploaded pictures will be placed in "Approved" folder by system)
- "Image path" - Insert UNC or shared path where uploaded pictures will be placed. (default pictures will be saved in [image path]\pending)
- "Service account to use to access image path" - Select a "serviceaccount" that has access to "image path". (Create/delete/modify access required)
NB : The user creating the setting must also have minimum (read access) to "Image path in order to setup.
- "Selfie" - The Selfie Access group is a security group in Active Directory granting access in UMS Web - Controlpanel to approve uploaded images.
NB : Only applies if "Auto approve photos" is not enabled.
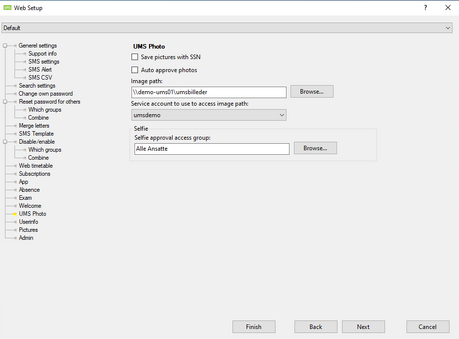
After setup of UMS Photos the IIS-server must be reset (iisreset). This will create 3 folders in addition to "image path".
- Pending
- Approved
- Rejected
NB : Only works if the selected service-account selected has (create/delete/modify) rights on the image path
Picture Libraries :
Picture libraries setting is used to configure where UMS (or 3rd party software) can "collect" pictures.
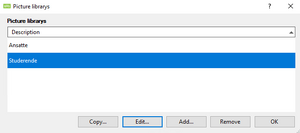
In the above example a setting for employees and students have been created (recommended)
Setting up Picture Library
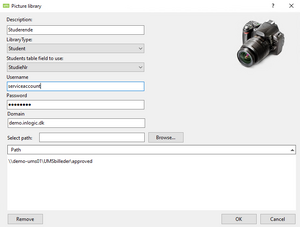
- Description - Name the setting
- LibraryType - Will determine whether used for ExportPictures2Adminsystem (Employees or students)
- Students table field to use - Select a field to use for filename of pictures (Studienr or SLI_ID recommended)
- Username - Username of service-account used for this setting (service-account from UMS Photos can be used here)
- Password - Password of service-account
- Domain - Domain of the service-account
- Select path - Browse to the image path NB : If UMS Photo is enabled / used, the "Approved" folder must be included in "select path" as shown in example
Picture libraries used by which job / systems?
- CopyPictures2Web - This job collects approved pictures in "[image path]\approved" and copies to setting Web Setup - Pictures path
- ExportPicturestoAdminsystem - Some systems that allows upload of pictures will also use this path for upload. (e.g Office365, Active Directory) NB : This feature is setup in the systems adminserver setting. (where available)
Where can users upload pictures from?
UMS Web – Brugerinfo / Userinfo / Selfie

If Selfie is enabled on user information, users will be able to upload a picture for approval.
UMS Web – Velkomst modul / Intro
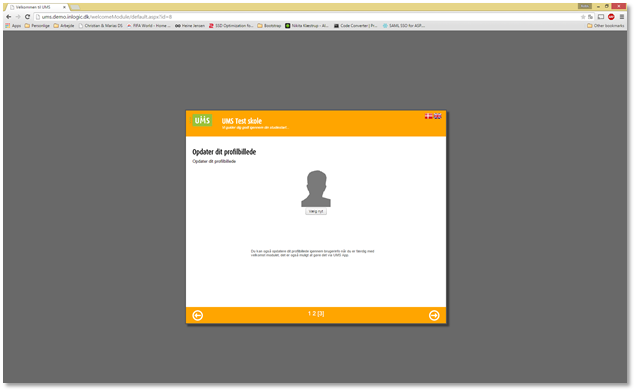
It is also possible to use UMS Welcome to upload a picture when onboarding.
When you have inserted the "update photo" page into the welcome module, users are shown a page with option to update their picture.
NB : Requires "selfie" enabled in "Userinfo" setting
UMS Photobooth
Additionally, there is the option to take pictures of students using a webcam, which is done through the control panel.
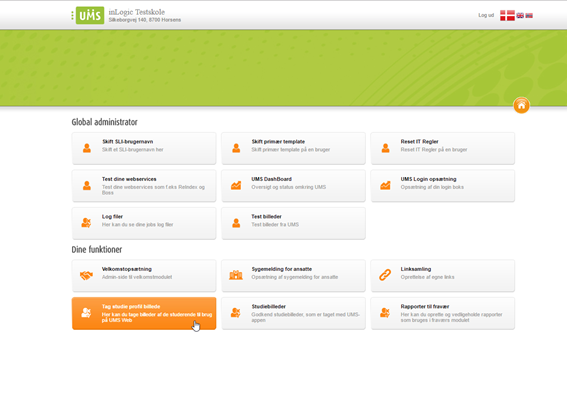
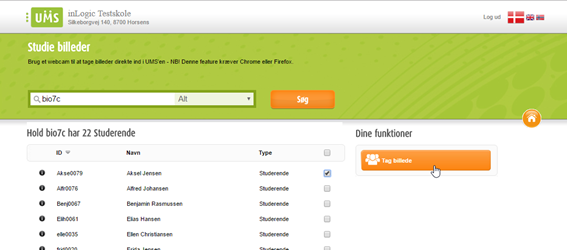
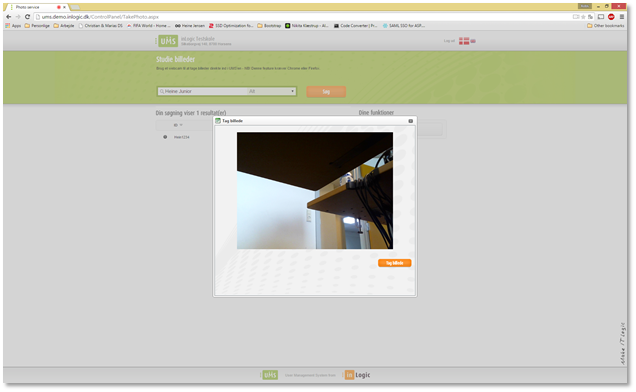
Once you have searched for a user, you select "take picture," and a popup appears where you are asked to activate the camera through the browser's security settings.
Once you have turned on the camera and taken the picture, it will go through the approval process.
UMS App
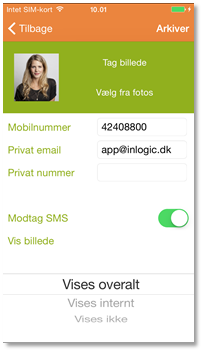
To gain access to upload a selfie picture, the setup in the configurator must be in place and the selfie option enabled for the app.
- Your information -> Edit and selecting "Take picture" or "Choose from photos" where you select from your device gallery.

Approval process
Human interaction
NB : This option requires that user with approval-rights via access group ALSO is present in UMS students table.
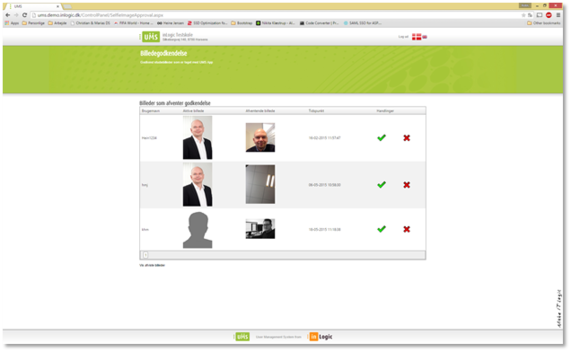
All images awaiting approval can be found under the "Controlpanel" -> "Student Pictures".
There you can see the active picture, the pending picture and the upload time.
When you want to approve a picture, you press the green check mark. If a picture is rejected, press the red cross.
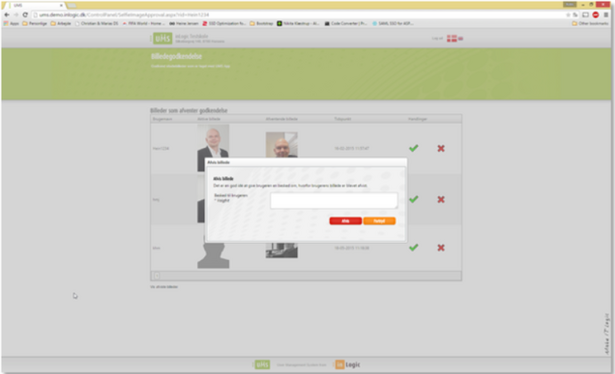
A box appears where you have the option to feedback to user why the picture has not been approved.
NB : That message is sent out as an SMS if you have that setup, otherwise it sends an email to the user.
Automatic approval
If automatic approval is enabled the uploaded images will be placed directly in "Approved" folder (e.g "image path\approved")
Technical settings
UMS Photo and UMS Frontend in DMZ
When the UMS Frontend server is placed inside the DMZ, theres no need to have the pictures inside the domain, unless you have some kind of student card printer.
So one way is to place the pictures on a UNC share created on the DMZ frontend server. When this is created, you need to create a domain account using SQL. Use the following:
INSERT INTO DomainAccounts (Description, DomainUser, DomainPassword, Domain, ShowOnWeb) VALUES ('Description', 'DomainUser', 'DomainPassword', 'Domain', 0)
You need to specify the computername of the frontend server in the domain column for this domain account.
Description: The Description of DomainAccount DomainUser: Username for the user used to connect to the UNC path DomainPassword: The password used to connect to the UNC path Domain: This must be set to the computername of DMZ frontend server ShowOnWeb: Should this DomainAccount be used on the login page? In this case, NO!
Now go inside the configurator, select Web Setup, Select UMS Photo and now select the newly created DomainAccount.
-- picture --
Restart the information service on the frontend server.
Open the Event Viewer and check for errors, if none and the site starts, you can now test that your pictures is uploaded and located on the frontend server.
Hereafter you'll need to get pictures from the UNC share into the UMS folder.
The easiest way to do this, is to create a small .bat file containing:
xcopy c:\pictures\Approved\*.jpg c:\inetpub\wwwroot\Pictures /s /y
xcopy c:\pictures\Approved\*.jpeg c:\inetpub\wwwroot\Pictures /s /y
and then trigger the bat file using Scheduled task inside windows.
Last remarks:
Do NOT use CPR for UMS Photo when deploying this setup. Do NOT put UNC path inside wwwroot folder. Handle the account like any other DomainAccount or Service Account - With care!
FAQ
Iphone does not present pictures available in Pictures folder?
If the UMS Frontend is installed on a Windows Server 2008 R2, the TLS version 1.2 must be enabled.
We highly recommend upgrading your UMS servers to run Windows 2016 to have features enabled default.
Which picture formats are supported?
JPG and JPEG.