UMS Links
The Links function makes it easy for users to access the school’s most frequently used IT-systems and services, e.g. learning management systems, dictionaries, knowledge databases, the school’s social media etc. This way users save time every time they access one of the frequently used services. Time, which can be spent on teaching and learning. Links can be used for UMS School App as well as UMS Web.
Prerequisites
Module requirements
UMS
Testing after setup
Create a link and check it is available on either web or app.
Installation
How to create a link through UMS Web
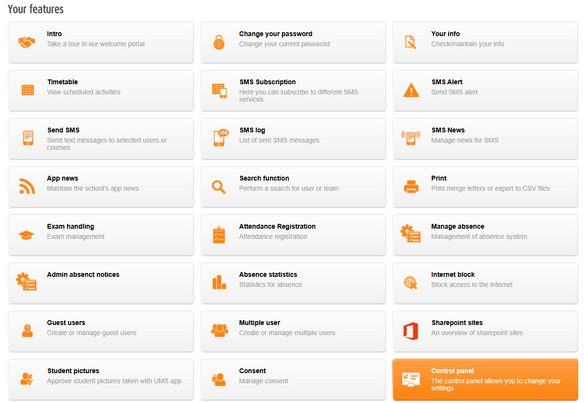
To access the links feature in UMS Web, you have to log into your UMS and find the "Control Panel". Note: You need admin permissions to access this feature.
Next navigate to your link collection as seen on the photo below:
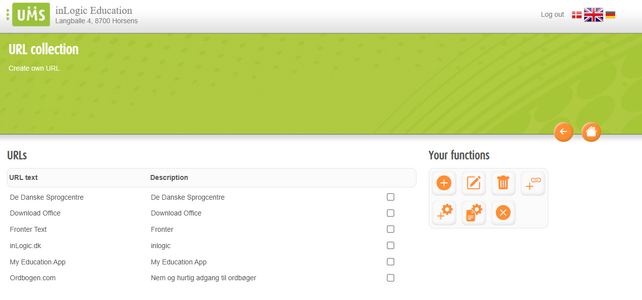
When you arrive at the link collection page you get presented with a overview of your current links and the options to the right.
Let's start by creating a new link, press the "plus" icon to the right, to create a new link.
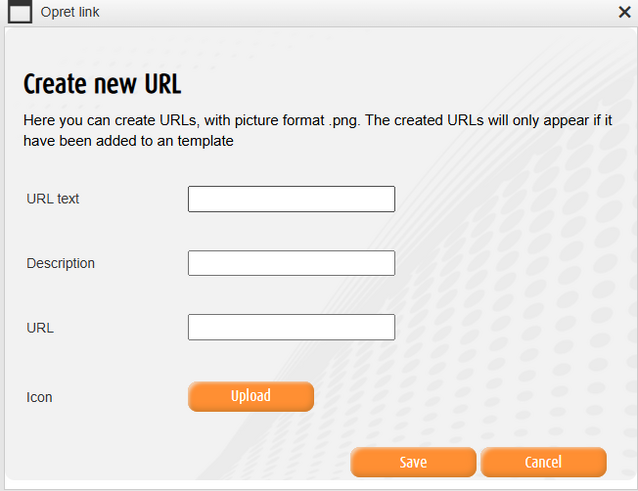
Here you can create a new link.
You need to fill out the URL text, the description and the URL field to create a new link.
The icon field is optional, but allows you to upload a custom picture to your link, which will be displayed for end-users.
Adding links to a link setting and creating new link settings
If this is your first time configuring links, you'll want to create a link setting.
This can be done by clicking the icon with the chainlink and the plus.
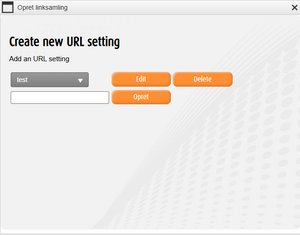
This window will allow you to put a name into the blank field and pressing "opret" (this should have been translated into add) will create a new link setting.
You can also from the dropdown menu, select an existing link setting and press edit. This will allow you to rename the setting.
Pressing delete on a link setting will delete the link setting.
Now that you have created your first link and your first link setting, it's time to head back to the overview and select the links you want to add to your newly created link setting.
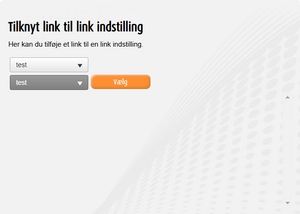
This can be done by clicking the icon with the plus and the gear.
The first dropdown menu is for selecting the link setting and the second dropdown menu is for selecting the link you want to add to said link setting.
Adding a link setting to a template
Now that you have put your links into a link setting, it's time to decide which users you want to apply these links to.
An example could be you have one link setting for your employees and another link setting for your students.
The link settings can only be applied to a template.
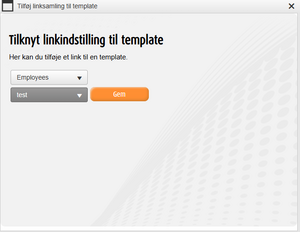
To add a link setting to a template you need to click the icon with the page and the gear.
The first dropdown menu will allow you to select a template and the second dropdown menu allows you to select a link setting.
Note: The users will not be able to see the links until you have done a IISReset.
Creating links in the Configurator
Everything described previously in this wiki page can be done in the Configurator as well.
To create a new link, navigate to your template editor and find the 'Links' setting.
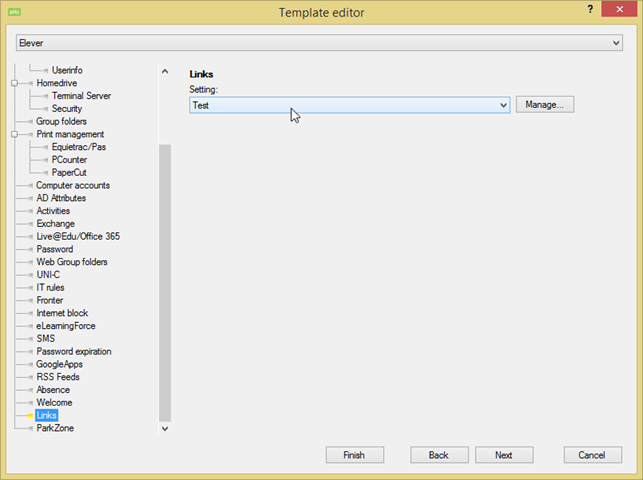
Here you can create and manage your link settings.
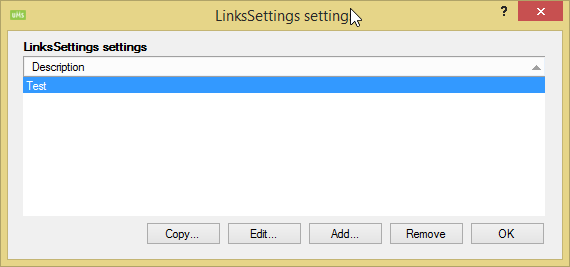
You need a link setting in order to create a new link. After creating a link setting, you can press edit to add links to it. You can also click remove to delete a link setting. Pressing the OK button closes the window.
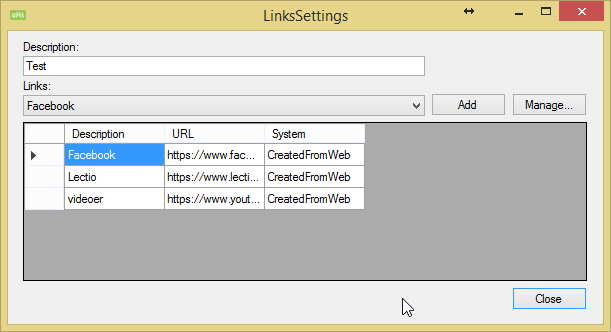
Whenever editing a link setting you should get a view similar to the picture above this text. From here you can add or manage your links.
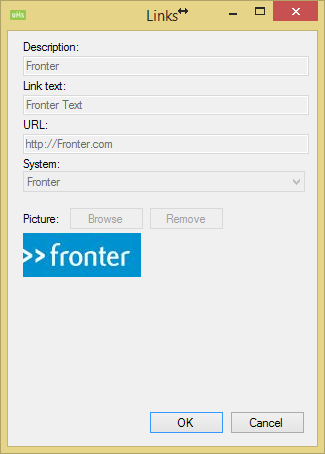
Pressing add will open up a window where you can configure a new link. Pressing manage allows you to edit or delete a link from your link settings.
See picture below for a preview of what editing your links look like:
Note: The users will not be able to see the links until you have done a IISReset.
FAQ:
When does the app update links?
The app grabs the links the next time the user logs in. Meaning if the link isn't showing up, try logging out and logging in again.
