Attendance Registration Advanced
Attendance Registration Advanced is an add-on module that gives extra functionalities to Attendance Registration. With this module, you gain access to an advanced statistical interface that makes it even easier to monitor attendance.
Attendance Registration Advanced offers you these advantages:
- You have access to a web-based view of the students’ attendance records and a statistical interface, making it easy to keep overview of the students' attendance activities. Students can keep track of their own attendance while teachers, student counsellors, and school management can see attendance for students and classes relevant to them. When you log on to UMS Web, you will see different data if you are a student, teacher, student counsellor, or manager. This means that you will only see information relevant to you.
- You get a Guardian Portal allowing parents, guardians, employers, social workers, and internship mentors to follow a student's progress during schooling. The Guardian Portal gives you access to the student’s timetable, attendance records, and grades. If there are new occurrences, you will automatically be notified. The portal also allows you to monitor several students at the same time if you e.g. have more than one child attending the school.
- School employees can create attendance reports through the web interface. The reports can be created for one or several students, e.g. based on the teachers of a class or the contact teacher for a group of students.
- Students can subscribe to text messages that will be sent when they are registered as absent. The text messages shows that the school engages in the students and invites the students back to the classroom (requires SMS Send).
- It is possible to print attendance sheets that teachers can use for e.g. field trips or in classes where it is not possible to register attendance through a computer (requires Merge Letters).
Prerequisites
Supported administrative systems
- Easy - (W031) (requires subscription to do so through STIL)
Module requirements
Testing after setup
To start testing after setup, you must log in as a teacher. See if you have access to attendance statistics on the front page of UMS portal. Please note that the module only will appear when the registered data is more than one day old.
To ensure that the system writes back to EASY, you can review the log files: Absence_ExportToAdminSystems.log. There are also logs in SQL table job_logs.
What to have ready
In order for the system to write back attendance data to EASY, it is necessary to:
- Have a running UMS installation and our module Attendance Registration.
- Contact UNI-C to gain access to W031. Have your institution number from UNI-C ready. You will be provided with a PIN code and access to W031. You can read more about W031 here.
- The IP address on the UMS server must be open in EASY.
Installation
User access
Access to the Attendance statistics interface is controlled through a standard AD group membership. The AD group membership will function whether the AD group is Global, Universal or mail-enabled groups.
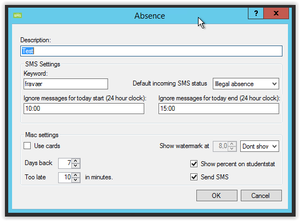
In order to edit settings for Attendance statistics, you can access the menu in the UMS Configurator by clicking on 'Web Setup' and selecting 'Absence'. See example below.
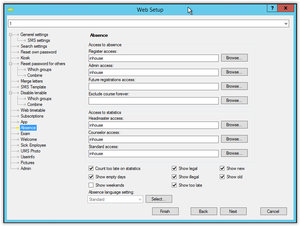
The following settings are needed for Attendance Registration Advanced:
- Headmaster access:
- Members of the chosen group has access to the schools overall statistics.
- If left blank, nobody has this access/role.
- Counsellor access:
- Members of the chosen group is treated as “student-counselors” which gives access to special note-types.
- If left blank, nobody has this access/role.
- Standard access:
- Members of the chosen group is treated as “standard-teachers” with access to all relevant absence-statistics for activities, students and so on.
- If left blank, nobody has this access/role.
- Show new/Show old checkboxes:
- These checkboxes are available so that you can choose whether to show old or new version of Absence extended. This option will be removed in later versions (when older version is end of life)
Please note that changing these settings will require an IIS-reset on the frontend to take effect.
Technical settings
Card system
Absence extended has the possibility to use come and go access systems to calculate the students presence. Currently card systems from Buanco supported as well as “custom” system where the come and go timestamps are collected from a webservice.
The Card system settings are controlled via. The menu “Modules/Absence/Card servers”:
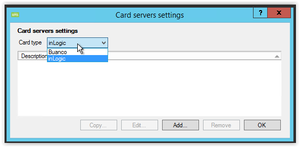
Chose which card system that are used from the “Card type” dropdown, and click add.
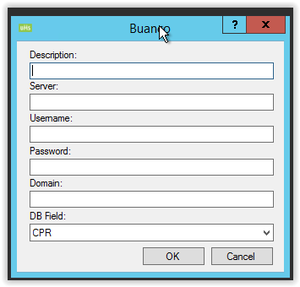
Following options are available:
· Description
Enter a description for the system
· Server/URL
Enter a server address for the server that delivers the data (IP or DNS). If inLogic is chosen for the card system then enter the URL used for data-retrieval.
· Username/Password/Domain
Enter credentials for the user that used for retrieving the data.
· DB Field
Chose which field used to identify/match the card user to a UMS created user/student.
After the card system settings is created, it is also needed to ensure that the service that retrieve the card data is started/running. Services are controlled through the menu “Settings\Services”.
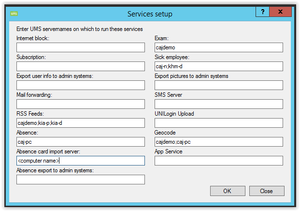
Enter a computer name for the server that you want the service to run on in “Absence card import server”.
Restart the service on the selected computer, and check the log file for connection status of the service (<install path>\UserManagement\CardImport.log).
Also you need to ensure that the absence settings for each template is using cards where needed.
Export to admin-system
The Write back webservice need to be setup so that the registered absence registrations can written back to the admin-system (EASY C).
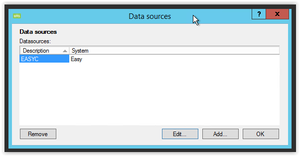
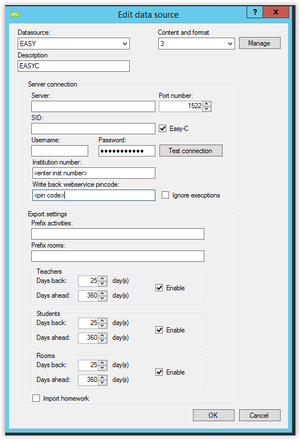
For setting up the write back absence you need to have a PIN code for the write back webservice (W31) from STIL. The data is entered under the data source for the timetableblocks, which is found under “Modules/Timetable/Data sources”
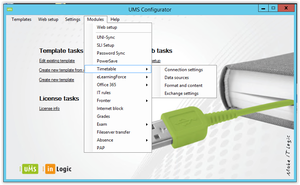
Edit the required data source:
Now enter the institution number and write back pincode:
After the write settings settings are entered, it is also needed to ensure that the service that sends the data is started/running. Services are controlled through the menu “Settings\Services”:
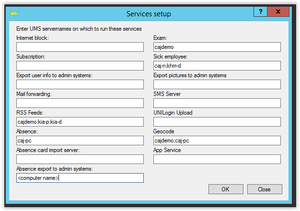
Enter a computer name for the server that you want the service to run on in “Absence export to admin systems”.
Restart the service on the selected computer, and check the log file for connection status of the service (<install path>\UserManagement\Absence_ExportToAdminSystems.log).
Geocode service
The Geocode service is responsible for collecting geo data for students address (for use in the Absence Stat Interface). For the service to work a Google token is needed.
The token has to be entered under “Settings/Geocode”:
If no token is entered, you need to sign up for one at Google. Simply click the “How to get token” link, and follow the directions.
Enter the acquired token, and make sure that the Geocode is allowed to run on a server “Settings/services”:
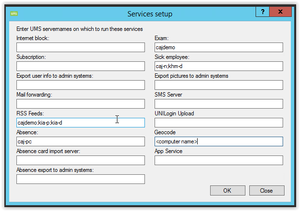
Enter a computer name for the server that you want the service to run on in “Geocode”.
Restart the service on the selected computer, and check the log file for connection status of the service (<install path>\UserManagement\Geocode.log).