AD Attributes
AD Attributes givse the ability to insert/maintain database values, from UMS, in Active Directory.
Prerequisites
Supported administrative systems
All
Module requirements
Active Directory required
Testing after setup
Create an AD-Attribute setting with atleast one AD-Attribute value set. Connect the setting to a Template and run RunTemplates. The attribute should now be set in AD.
What to have ready
- UMS must be installed and data from administrative system must be available.
- Access to AD must be available.
Installation
Install UMS.
Technical settings
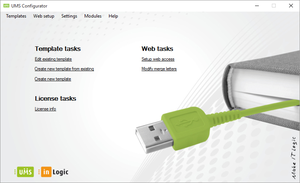
To add AD-Attribute setting in Configurator press “Edit existing template”:
Press “AD Attributes”:
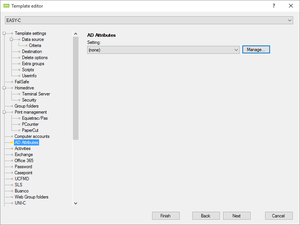
Press “Manage…” followed by “Add…” in the form that pops up.
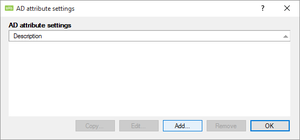
Add AD-Attributes setting:
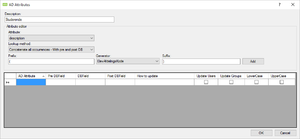
- Description: AD-Attribute setting name.
- Attribute: Active Directory field to be set.
- Lookup method: Method for getting database value, ”First found occurrence”, ”Concatenate all occurrences” or ”Concatenate all occurrences – With pre and post DB”.
- Prefix: Fixed text before database field.
- Generator: Database field to insert, ex. ”STUDIENR” or ”ElevAfdelingsKode”.
- Suffix: Fixed text after database field.
To add attribute to setting, press Add
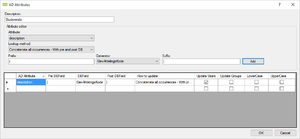
The following options are set after attribute has been added to setting:
- Update Users: The AD-Attribute will be updated everytime RunTemplates runs. Update user only.
- This option is set by default, can be removed.
- Update Groups: AD-Attribute will be updated everytime RunTemplates runs. Update group only.
- LowerCase: All in lower case.
- UpperCase: All in upper case.
When all attributes have been added, press Ok to save the setting, or Cancel to discard changes and exit.
If added attribute is wrong it cannot be edited, to delete attribute. Mark the attribute row and press ”Del” on your keyboard.
FAQ
How do i delete an AD-Attribute?
If added attribute is wrong or not needed anymore, it can be deleted. Mark the attribute row and press ”Del” on your keyboard. Press “OK” to save and exit.
