Password Self Service
With Password Self-service, users can change their own password, without involving the IT-department. The password is changed through UMS in a browser, regardless if the user is logged in or not. Because the users can change their own passwords, it only takes a few moments before they can get back to studying. It saves time for the students as well as the IT-department, which can focus on other tasks. The module ensures that the user’s password meets the school’s own password guidelines, as well as the guidelines of the school’s other IT-systems, e.g. Google Apps and Office 365.
Prerequisites
Supported administrative systems
Module requirements
Additional functionality
Testing after setup
What to have ready
Is any physical item required
Should third party be contacted
Installation
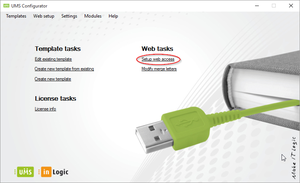
Open Configurator and click ”Setup web access”

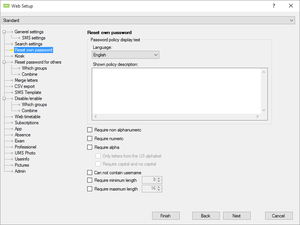
Click “Reset own password”

- Language: Choose the language for which you wish to edit policy text.
- Shown policy description: The text to show on frontend when using password-selfservice.
- Require non alphanumeric: Set option to require special character in password.
- Require numeric: Set option to require number in password.
- Require alpha: Set option to require character in alphabet.
- Only letters from the US alphabet: Set option to allow only a-z or A-Z (country specific characters not allowed). Only available if Require alpha is set.
- Require capitol and no capital: Set option to require upper and lower case characters. Only available if Require alpha is set.
- Can not contain username: Set option to restrict the use of users login name.
- Require minimum length: Set minimum password length. If checked it will enforce length.
- Require maximum length: Set maximum password length. If checked it will enforce length.
Setup Service account to use with Password-Selfservice:
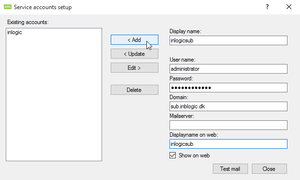
Open Configurator and click “Settings” then “Service Accounts”

Create Service Account attachment

- Display name: Descriptive name.
- User name: User name for domain account with rights to Create/Delete/Reset Password in AD.
- Password:
- Domain: FQDN for the Domain to which the username connects.
- Mailserver: For sending mails in UMS web (FQDN)
- Displayname on web: Descriptive name.
- Show on web: if multiple service accounts are shown on web, there will be a dropdown box, where the service accounts can be chosen, in the Password-Selfservice popup on UMS Web.
When filled, remember to click “Add”