UMS Welcome
The initial contact with the school's future students is extremely important and with UMS Welcome, you will have the opportunity to give the future students a good first impression when they start school. UMS Welcome consists of two main elements;
- The welcome window
- Setup page
In this manual we come around all both elements and how they are set up and used in practice. With the module you will get ample opportunity to combine the welcome by the school's specific needs. It introduces the future students for the most necessary information, so you guarantee that new users make use of the school's technology, already from the start.
Prerequisites
User Manual
http://downloads.inlogic.dk/Manualer/UMS_Velkomst_DK.PDF
Supported administrative systems
- User information: Easy-A, SIS and Lectio (Only mobile number).
Module requirements
Must have
- UMS
- UMS Web
Needed for full support
- User information
- UMS Photo
- IT Rules
- Change Password
- SMS Welcome
Additional functionality
UMS Velkomst skriver "kun" brugerinfo tilbage, hvis man har brugerinfo og export bruger information license. UMS Velkomst hjælper med, at kunden altid har opdateret kontakt informationer for nye brugere.
Testing after setup
What to have ready
Fully updated UMS and UMS Web installation.
Is any physical item required
If UMS Welcome SMS is wanted, you want a form of SMS modem, or a service that allows sending SMS.
Should third party be contacted
No.
Installation
Installation
- Install lastest updates
- Install new license with UMS Welcome
Need configuration
In order to get your UMS Welcome to work, you need to have access to the "control panel" link, inside your UMS Web.
Technical settings
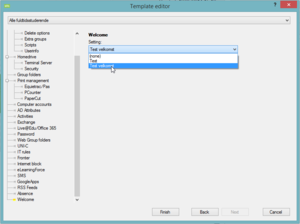
This can be done in two different ways. You can either put one welcome up for the entire site, so for example. all fields of study receive the same welcome. This is done under "Web setup" and "Welcome". Here you will see the dropdown menu that allows you to choose your welcomes in. Alternatively, you can choose to put the welcome on a single template, for example. if the school has different study programs or classes to be shown different welcomes in. This is done by selecting "Edit eksisterende template" and "Welcome". Also here you will see a drop down menu where you can choose from your welcomes in. This way you have the opportunity to make multiple welcomes in for different templates so that they can be adapted directly to the recipient.
