Moodle
Our Moodle integration is developed for schools, which want to avoid hour-long administrative tasks. The integration automatically creates, maintains and deletes users, based on data from your student administrative system. It also creates and maintains group rooms, which teachers and students can use for teaching purposes. The rooms are automatically get to use the language you require and can be categorized according to your needs, making them easier to find. Rooms that are no longer in use are deleted automatically. CONFIGURATION IN UMS The integration makes it possible to upload pictures of the users to Moodle, making it easy for teachers and students to see whom they are interacting with. If these pictures are replaced in UMS, they are automatically updated in Moodle. Last, but not least, the module can integrate with the AD. This allows users to log into Moodle with the same password they use to access the school’s IT-system. The Moodle integration gives you an easy overview and ensures that the users’ data is always managed correctly, without requiring any manual updates. This frees up time for the IT-department, who can focus on other tasks instead.
If you want to make it easy for students and teachers to keep track of their timetables, you can embed our Web Timetable module in Moodle as an iframe. By doing this, users can access homework and notes that are registered on the various timetable blocks in the timetable. Please note: To embed Web Time Table, the Web Timetable and SSO modules are required. In order to see homework, the Homework module is required.
Prerequisites
Module requirements
What to have ready
Moodle
Installation
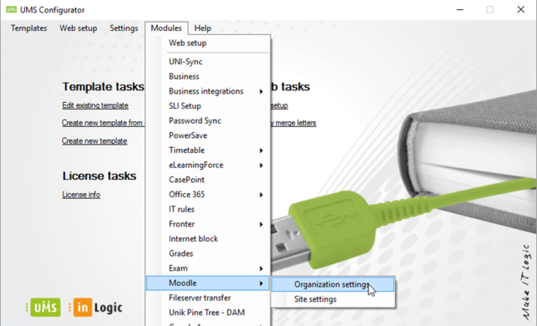
Open UMS Configurator and go to Modules > Moodle > Organization settings

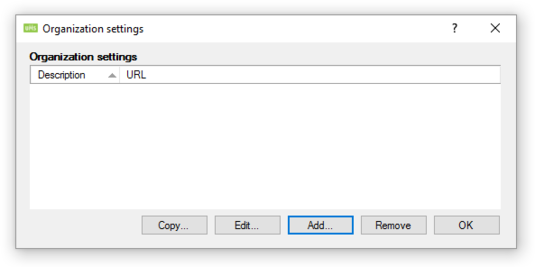
Click Add.

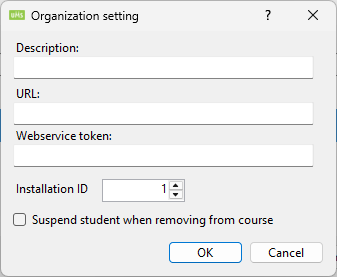
Organization settings

· Description: Give your Organization setting a name.
· DatabaseServer: Name of database server hosting the Moodle database.
· DatabaseName: Name of Moodle database.
· Database TablesPrefix: Table prefix set when installing Moodle.
· UserName: UserName for the user authorized to use the Webservice Token.
· Password: Password for the user authorized to use the Webservice Token.
· URL: URL for your Moodle installation ex. http://moodle.inlogic.dk
· Webservice Token: Token created in Moodle siteadministration. Guide to create access and token ( Remember: When adding functions to webservice, add all functions )
· DataPath: Moodle data path ex. \\moodle.inlogic.dk\c$\Moodle\server\moodledata\filedir
· DatabaseType: Choose Database type used for Moodle..
o Microsoft SQL
o MySQL
o Oracle SQL
Moodle Site settings
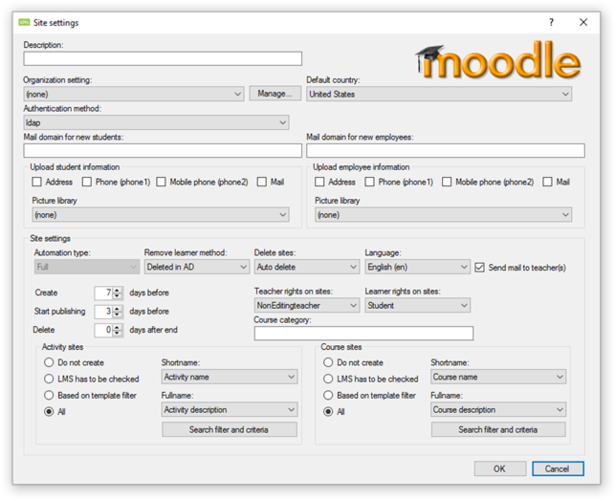
From Configurator, Edit existing template > Moodle > Manage > Add or Configurator > Modules > Moodle > Site Settings > Add

· Description: Give the Site settings a name. ( Required field )
· Organization settings: Choose the Organization setting you want to use for this site setting. ( Required field )
· Default country: Choose default country.
· Authentication method:
o Ldap
o Manual
· Mail domain for new students: