Parking: Difference between revisions
| Line 84: | Line 84: | ||
You can connect a parking setting to a template: | You can connect a parking setting to a template: | ||
#Go to edit | #Go to edit template. | ||
#Find the parking menu and select the parking setting you want for you template. | #Find the parking menu and select the parking setting you want for you template. | ||
===Legacy Parking Settings=== | ===Legacy Parking Settings=== | ||
Revision as of 08:36, 21 November 2024
The Parking function makes it easy for users to avoid parking tickets at school. With this module, the school can administer their parking spaces with the parking company. Through the app, students and employees can get a valid, digital parking permit simply by entering their vehicle’s registration number in the app or in UMS Web. When the registration number has been entered, it becomes visible to the parking company. The parking company will then know that the user is allowed to park at the school. Available integration includes Parkzone, APCOA, and City Parkeringssystem.
Prerequisites
Supported administrative systems
- Parkzone
- Apcoa
- City Parkering
- The public IP address of the web server and backend server needs to whitelisted at City parkering.
Module requirements
Parking
Should third party be contacted
You'll need a client key (and possibly a password) from the parking company before UMS can communicate with their services.
Installation
It is necessary to have a running UMS installation.
Configuration settings
There are two ways of setting up parking: New Parking and Legacy Parking. In the future, Legacy Parking will be moved to the new system. Currently, new Parking settings are used for City Parkering and Legacy Parking settings are used for ParkZone and Apcoa.
New Parking Settings
In the configurator go to:
Modules -> Parking
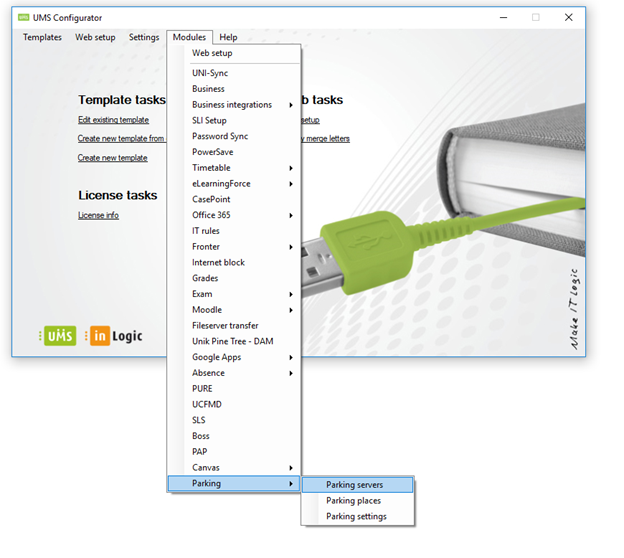
There are 3 main parts of the parking system that needs to be set up:
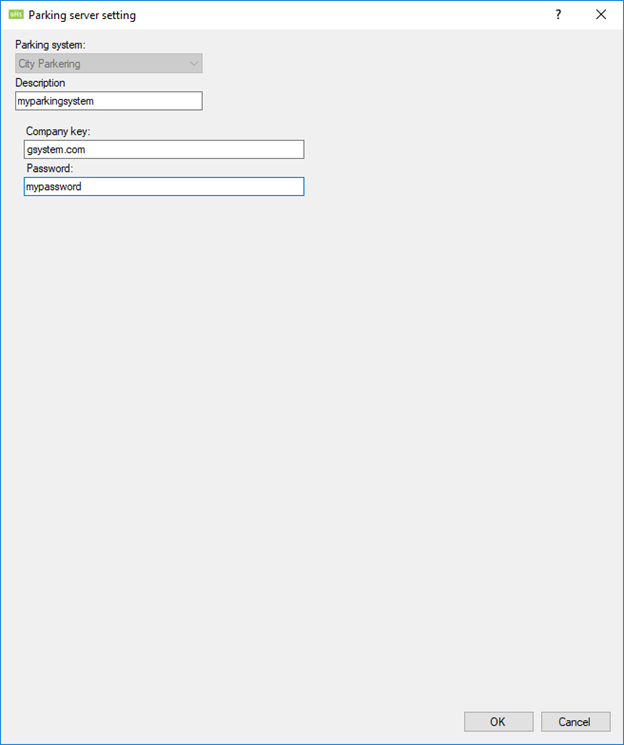
1. Parking servers
It is possible to set up multiple parking server systems.
First, choose your parking system:
- City Parkering
- Q-Park
The description is used as a name or reference in the configurator and is not visible to users.
You should have been provided a company key and a password by your parking provider. Enter them in these parking server settings.
2. Parking places
You can have multiple parking places.
The parking place description is shown to users that have multiple parking systems to choose from, so make sure that this is a good identifier.
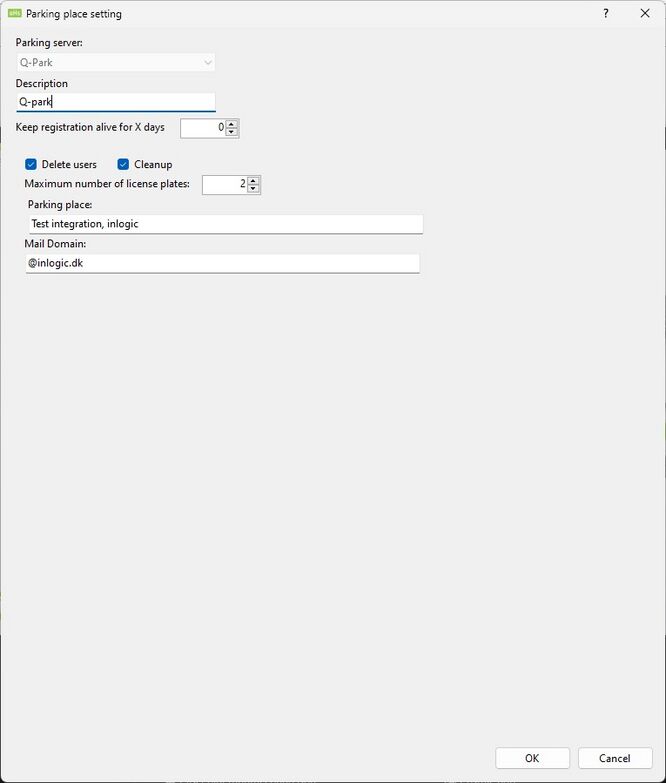
Keep registration alive for X days
Keeps the registration alive in the parking system for x number of days after the user is no longer allowed to park at the parking place.
0 means it will not be kept alive.
Delete users
Users that are removed in UMS will also be deleted from the parking system.
Cleanup
Users that exists in the parking system but not UMS will also be deleted.
Maximum number of license plates
Set the number of registrations a user is allowed to have at this parking place.
Parking place
Q-Park:
Enter the name of the parking place not the ID
Mail Domain
Is used only when a parking is created for a user that does not have a private email address entered. If there is a private email address, it will be used. Otherwise, the username concatenated with the Mail Domain will be send.
Upload name of users
City Parkering:
Enabling this will tell UMS to upload the first name and given name of users.
3. Parking settings
You can set up a parking setting per template, so that one set of users have access to some parking places but not others.
If you only have one parking place, and everyone has access to it, you can just create one parking setting.
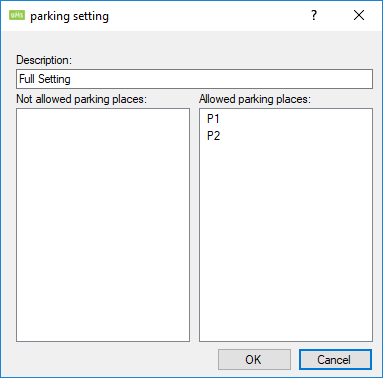
You can connect a parking setting to a template:
- Go to edit template.
- Find the parking menu and select the parking setting you want for you template.
Legacy Parking Settings
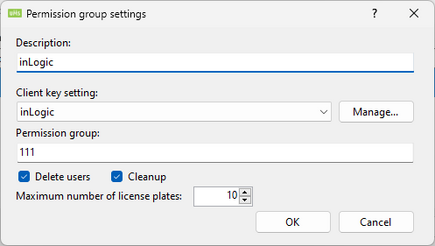
1. ParkZone setup
All settings for the Parking module is set in the configurator. Go to Template Editor -> Parkzone -> Manage -> Add
- 'Description' - This is the name for your setting, i.e. 'Test Plads'
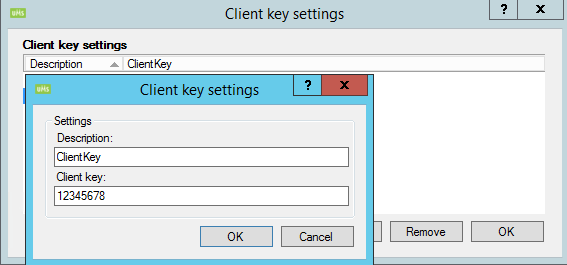
- 'Client Key settings' - Insert the provided client key from ParkZone. To edit the settings for the client key, click 'Manage'. See picture below for illustration.
- 'Permission group' - Insert the provided parking location ID from ParkZone
- 'Delete users' - Check this box if a user should be disabled when removed from AD. If left unchecked, the user will only be disabled if the end date is set to now
- 'Cleanup' - Check this box if UMS should synchronise if users are active or deleted
- 'Maximum number of license plates' - Set the limit of license plates a user may add
The picture below illustrates the settings when managing the client key.
2. APCOA setup
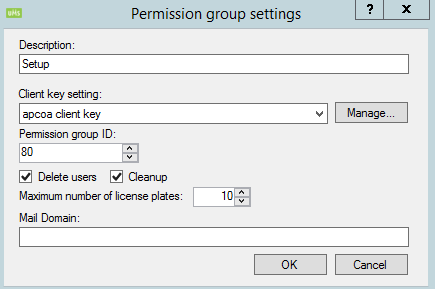
All settings for the Parking module is set in the configurator. Go to Template Editor -> APCOA -> Manage -> Add
- 'Description' - This is the name for your setting, i.e. 'Setup'
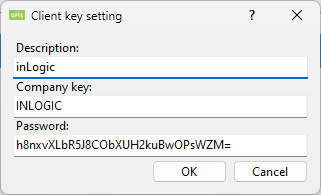
- 'Client key settings' - Insert the provided client key from APCOA. To edit the settings for the client key, click 'Manage'. See picture below for illustration.
- 'Permission group ID' - Insert the provided parking location ID from APCOA
- 'Delete users' - Check this box if a user should be disabled when removed from AD. If left unchecked, the user will only be disabled if the end date is set to now
- 'Cleanup' - Check this box if UMS should synchronise if users are active or deleted
- 'Maximum number of license plates' - Set the limit of license plates a user may add
- 'Mail Domain' - User suffix
The picture below illustrates the settings when managing the client key.
App
Parking spaces
This view is a list of all parking spaces the school has available (based on your template).
If you only have 1 present, that parking space will automatically be selected and this step will be skipped.
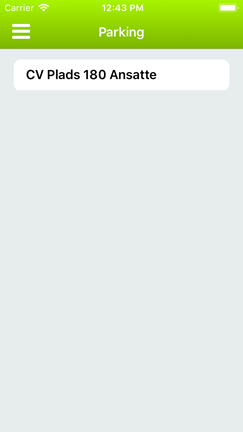
Parking registrations
When you have selected a parking space, you will see a list of your registered license plates along with a timestamp of when this was registered.
Here you can edit and delete existing registrations, as well as create more, up to the allowed number of registrations the school has specified.
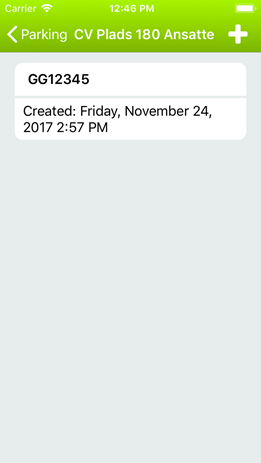

General info
The app does not (visually) act differently whether the school is running APCOA, Parkzone or CityParking.
Web interface
To register a license plate with a parking system go to “Your info”.

If a parking system has been installed and you have access to it, you should see a parking menu.
You can then create a new parking, by clicking on the "create new".

Enter your license plate and select which parking location you want to use. If you only have access to one parking place, you do not have to choose one.
Once you click 'ok', the parking should be registered with the parking system and you should be good to go.

You can always edit or delete your parking.
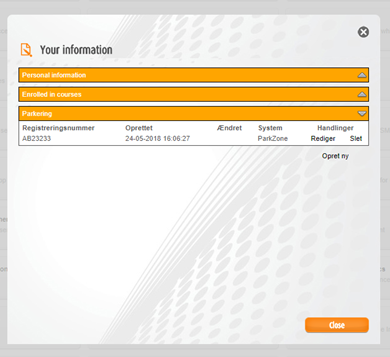
Parameters
CityParking
Only runs City parking (This is a system type)
CreateRegistrations
Create registrations
UpdateRegistrations
Update registrations
DeleteRegistrations
Delete registrations
DeleteActiveRegistrationsNotFoundInDB
Delete all unknown (to UMS) registrations in a parking place. Recreate all missing registrations in the parking system.(Known to UMS but not parking system)
ShowParkingPlaces
Show parking places that exists on the parking servers
ShowRegistrationInParkingPlace
Show all registrations in a specific parking place
This can be either the parking place id or the description for that parking place in UMS