Microsoft SDS: Difference between revisions
| Line 20: | Line 20: | ||
====Create a new IIS site and application pool==== | ====Create a new IIS site and application pool==== | ||
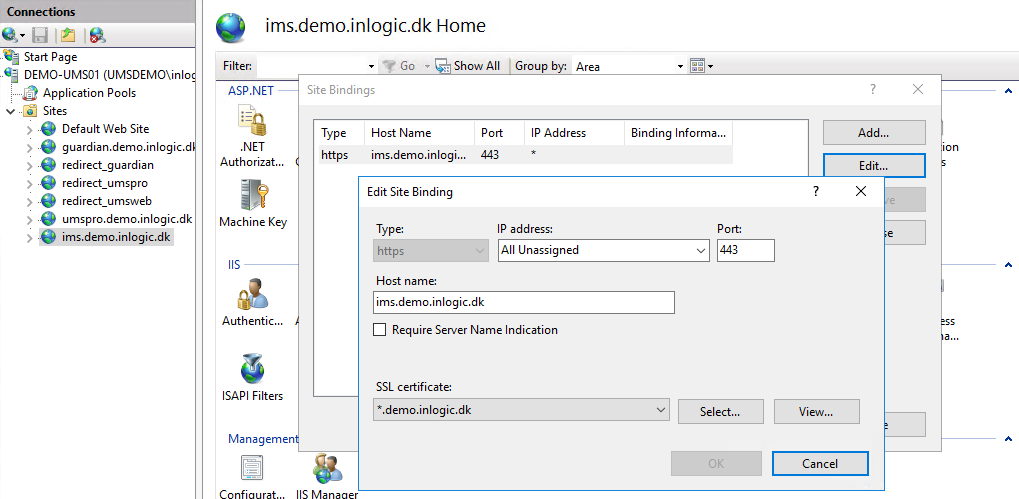
Hostheader example ims.demo.inlogic.dk | Hostheader example ims.demo.inlogic.dk | ||
[[File:SDS webservice on UMS frontend server.png]] | |||
====Download and install the webservice “IMS sync”==== | ====Download and install the webservice “IMS sync”==== | ||
Go to inLogic download page https://www.inlogic.dk/support/download/ | Go to inLogic download page https://www.inlogic.dk/support/download/ | ||
Revision as of 13:16, 7 December 2018
Go to this page and login with the credentials of the tenant you want to setup SDS for.
Prerequisites
Module requirements
- UMS
- Teams configurations
- Modules, a Office 365 Tenant setting
- Modules, a Office 365 Teams setting
- Templates must have an Organization type
- Templates must have a Office 365 Teams template
- Updated data in SQL tables (update data with LiveAtEdu_Sync)
Installation of SDS webservice
Install a new webservice on your UMS frontend webserver that enables synchronization between the roster (DK: “skoleplan” eller “datagrundlag”) in your UMS and Microsoft School Data Sync.
Create a new IIS site and application pool
Hostheader example ims.demo.inlogic.dk
Download and install the webservice “IMS sync”
Go to inLogic download page https://www.inlogic.dk/support/download/
Copy Usermanagement.ini to bin folder
This file contains connectionstring to SQL Server
Register the hostheader in DNS
Open the firewall
Configuration of SDS profile
Login to https://sds.microsoft.com as an administrator
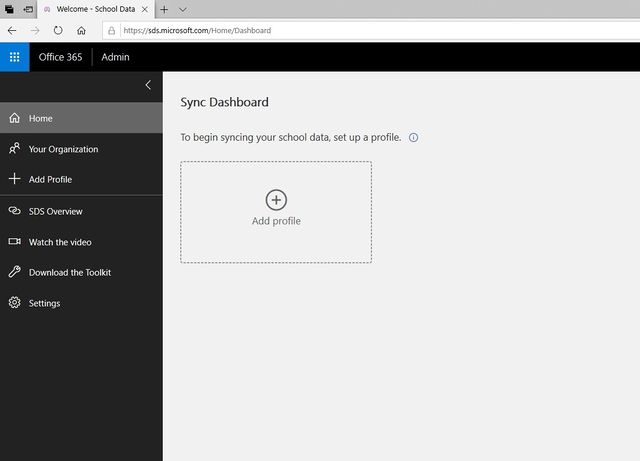
Click Add Profile
Choose connection type
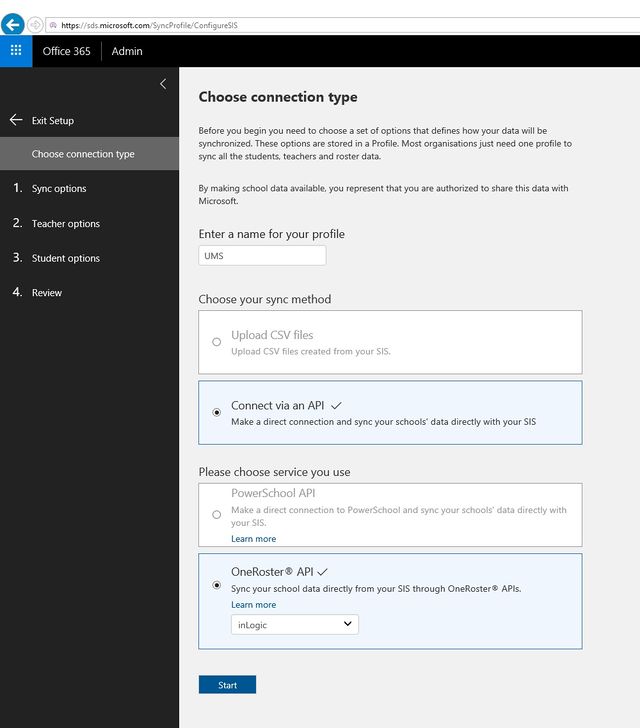
Choose settings as shown above.
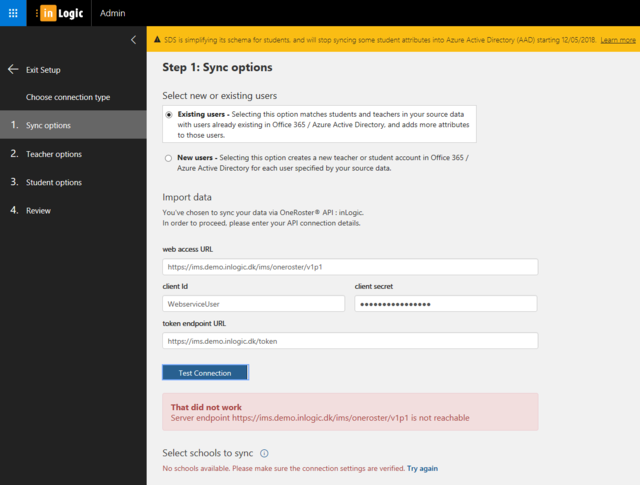
Step 1: Sync options
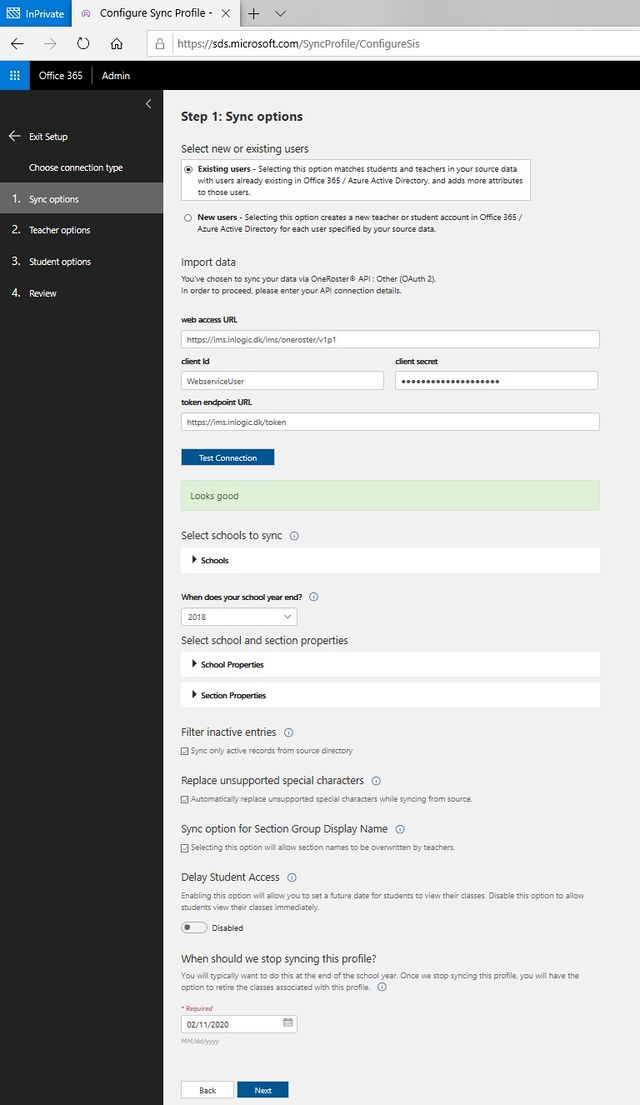
Import Data
- Web access URL, example: https://ims.demo.inlogic.dk/ims/oneroster/v1p1
- Client ID is always "WebserviceUser"
- Client secret can be found in SQL using select * from WebServicesSettings
- Token endpoint URL, example: https://ims.demo.inlogic.dk/token
You have to click Test Connection and it needs to be successful otherwise the next button won't be available
When does your school year end
This has no meaning in a UMS synchronization. Just set it to the max year.
Replace unsupported special characters
Enable this.
When should we stop syncing this profile
It is not possible to set a date that never expires. This means that this has to be updated every year to the highest possible date.
Step 2: Teacher options
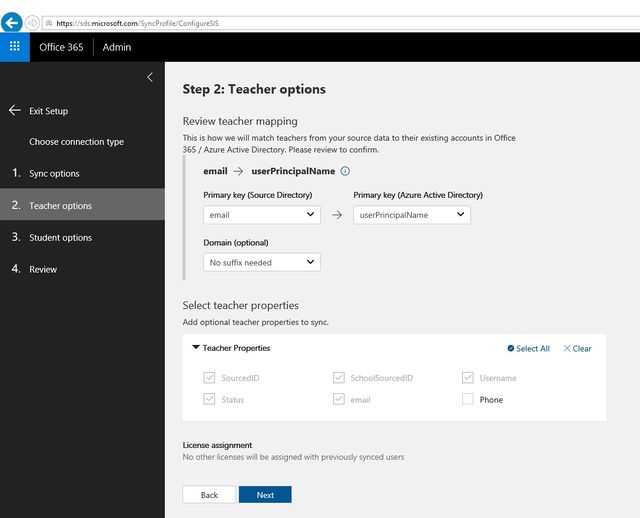
Teacher mapping
You need to set primary key to email.
Teacher properties
Expand and check it matches picture.
Step 3: Student options
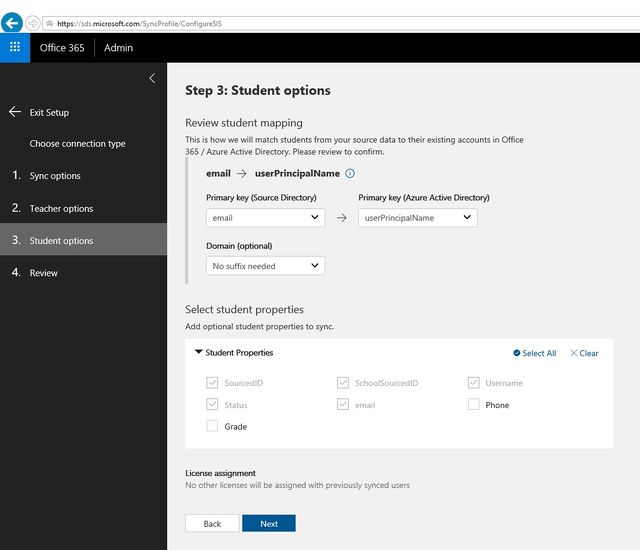
Student mapping
You need to set primary key to email.
Student properties
Expand and check it matches picture.
Step 4: Review
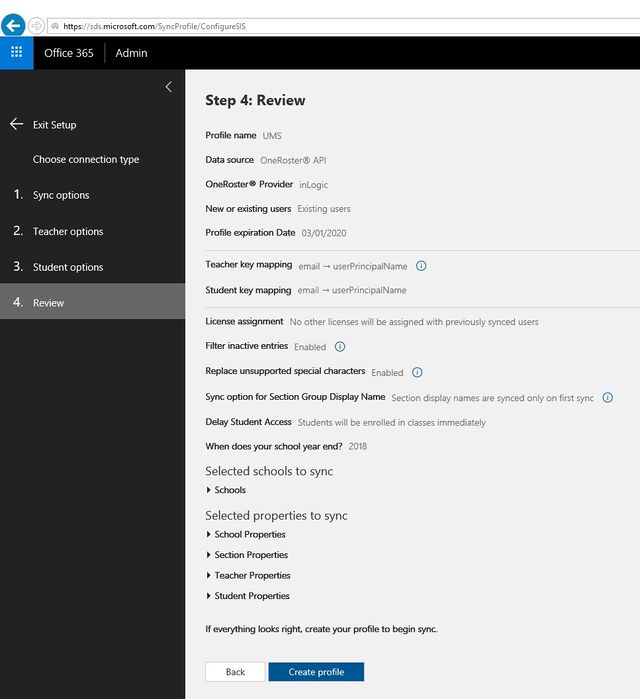
This end result should look similar to this.
The profile is now created will start sync after some minutes.
FAQ
More info here https://docs.microsoft.com/en-us/schooldatasync/how-to-deploy-school-data-sync-by-using-powerschool-sync
That did not work
Endpoint not reachable due to
- incorrect endpoints, username or password
- dns problems or firewall
- UMS backend is not configured properly
Sorry, we can't sign you in
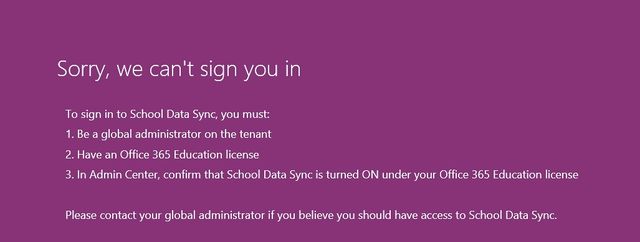
Add a license to user that your trying to access SDS with
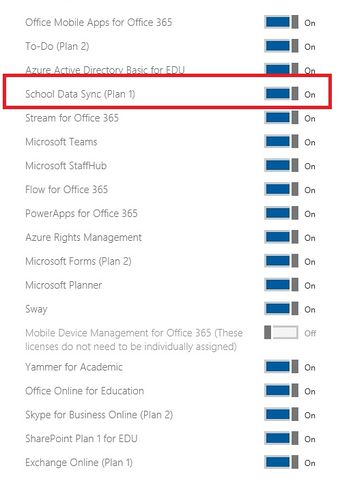
You need to relog after this license change.
Errors in synchronization
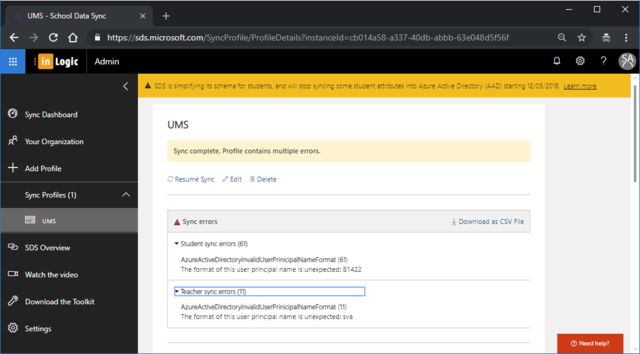
In this case I have mapped wrong primary keys according to step 3 in the wiki.
Sorry to say, but you need to delete the SDS profile. Set it up again and wait for 24 hours.
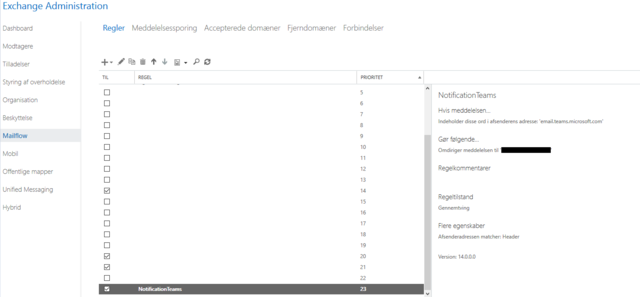
Prevent Teams from sending spam to users
If sender address contains “email.teams.microsoft.com” then redirect them to someone else.
