Apple Developer Account: Difference between revisions
No edit summary |
mNo edit summary |
||
| Line 2: | Line 2: | ||
== Create Apple Developer Account == | == Create Apple Developer Account == | ||
If you do not have an Apple ID | If you do not have an Apple ID for your organization already, you can follow this guide to create one: | ||
https://appleid.apple.com/account | https://appleid.apple.com/account | ||
After creating your account, you need to enroll for Apple Developer Program. Follow the guide below: | |||
https://developer.apple.com/programs/enroll/ | https://developer.apple.com/programs/enroll/ | ||
== Add App Store Connect User == | == Add App Store Connect User == | ||
inLogic will need access to be able to create and upload new updates for your app. You do so by adding our another App Store Connect User. | inLogic will need access to be able to create and upload new updates for your app. You do so by adding our account as 'another App Store Connect User'. | ||
Go to https://appstoreconnect.apple.com/ | Go to https://appstoreconnect.apple.com/ | ||
Select | Select 'Users and Roles'. | ||
[[File:Appstore usersandroles.png|none|thumb]] | [[File:Appstore usersandroles.png|none|thumb|164x164px]] | ||
Select the plus icon | Select the plus icon. | ||
[[File:Appstore plusicon.png|none|thumb]] | [[File:Appstore plusicon.png|none|thumb]] | ||
Fill in the | Fill in the 'User Information' with the following information and click 'Next'. | ||
[[File:AppstoreUserInformation.png|none|thumb|445x445px]] | [[File:AppstoreUserInformation.png|none|thumb|445x445px]] | ||
Check the role | Check the role 'App Manager' and make sure that access is given to 'All apps'. You can also give limited access to apps in case there are apps inLogic do not need access to. | ||
Select Next | Select Next | ||
[[File:AppstoreAddAppStoreConnectUsers.png|none|thumb|743x743px]] | [[File:AppstoreAddAppStoreConnectUsers.png|none|thumb|743x743px]] | ||
For App Status Reports select | For App Status Reports select 'All Territories' and click 'Save'. | ||
[[File:AppstoreNotifications.png|none|thumb|1117x1117px]] | [[File:AppstoreNotifications.png|none|thumb|1117x1117px]] | ||
You will now see that a confirmation email has been sent to inLogic. | |||
[[File:AppstoreConfirmationEmail.png|none|thumb|519x519px]] | [[File:AppstoreConfirmationEmail.png|none|thumb|519x519px]] | ||
Revision as of 07:35, 5 July 2018
This guide describes how to create your Apple Developer Account and give access to inLogic to administrate your app.
Create Apple Developer Account
If you do not have an Apple ID for your organization already, you can follow this guide to create one:
https://appleid.apple.com/account
After creating your account, you need to enroll for Apple Developer Program. Follow the guide below:
https://developer.apple.com/programs/enroll/
Add App Store Connect User
inLogic will need access to be able to create and upload new updates for your app. You do so by adding our account as 'another App Store Connect User'.
Go to https://appstoreconnect.apple.com/
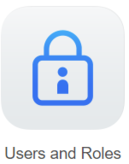
Select 'Users and Roles'.

Select the plus icon.

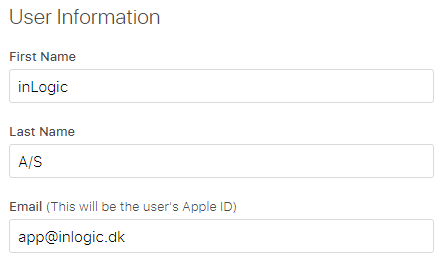
Fill in the 'User Information' with the following information and click 'Next'.

Check the role 'App Manager' and make sure that access is given to 'All apps'. You can also give limited access to apps in case there are apps inLogic do not need access to.
Select Next

For App Status Reports select 'All Territories' and click 'Save'.

You will now see that a confirmation email has been sent to inLogic.
