Password Change: Difference between revisions
No edit summary |
No edit summary |
||
| Line 28: | Line 28: | ||
The settings can be found under “Web setup\Edit” | The settings can be found under “Web setup\Edit” | ||
=== Allowed groups === | |||
[[File:Passwordchangewebsetup.png|none|thumb|819x819px]] | [[File:Passwordchangewebsetup.png|none|thumb|819x819px]] | ||
| Line 35: | Line 37: | ||
*A number of groups (AD groups) which can have their password reset. | *A number of groups (AD groups) which can have their password reset. | ||
First | First a group needs to added with access to reset password for users. | ||
[[File:Passwordchangeaccesstoreset.jpg|none|thumb|498x498px]] | [[File:Passwordchangeaccesstoreset.jpg|none|thumb|498x498px]] | ||
*Enter a saying display name, and browse for an existing AD group. | *Enter a saying display name, and browse for an existing AD group. | ||
| Line 44: | Line 45: | ||
*For each group it is possible to allow the user to set “Change password at next logon” or to force the setting | *For each group it is possible to allow the user to set “Change password at next logon” or to force the setting | ||
==== Max number of users ==== | |||
This defines how many users can be reset in one request. If user is a member of multiple settings the largest number is used. | |||
if you enter a 0 its means no limit and is therefor seen as the largest number. | |||
=== Which groups === | |||
Next step is to choose the groups that can have their password reset with this module: | Next step is to choose the groups that can have their password reset with this module: | ||
[[File:Passwordchangewhichgroups.png|none|thumb|819x819px]] | [[File:Passwordchangewhichgroups.png|none|thumb|819x819px]] | ||
| Line 54: | Line 61: | ||
*Choose a Service Account with access to the domain in which the group is residing. | *Choose a Service Account with access to the domain in which the group is residing. | ||
=== Combine groups === | |||
The last step is combine the 2 groups: | The last step is combine the 2 groups: | ||
[[File:Passwordchangecombine.png|none|thumb|819x819px]] | [[File:Passwordchangecombine.png|none|thumb|819x819px]] | ||
Revision as of 11:14, 1 March 2021
With Password Change, users with the appropriate rights – e.g. teachers or administrative staff – can change password for other uses with just a few clicks. It is possible to change passwords for individual entire classes or groups, without involving the IT department. Password Change is particularly helpful if more users need to change their password at the same time, e.g. entire classes, as this is the least time-consuming option. It is, however, also possible to change password for one individual user at a time.
Prerequisites
Supported administrative systems
All
Module requirements
A valid license for Password Self-service
A valid license for Password reset (reset password for others)
Testing after setup
Log in with the user who has access to change the password. Change password and check that it has switched.
What to have ready
Active Directory
Password Filter must be installed on all DCs
Installation
This module is already installed with the standard UMS Web installation.
Technical settings
The password is always reset to the password setting on the individual users primary template.
The settings can be found under “Web setup\Edit”
Allowed groups
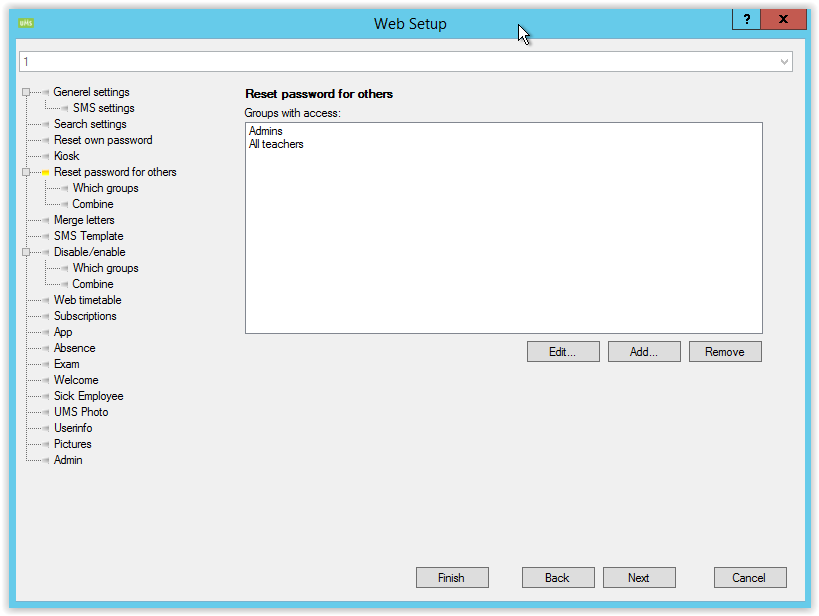
The configuration of “User lock” consist of 2 sets of settings:
- A number of groups (AD groups) which have access to reset users password.
- A number of groups (AD groups) which can have their password reset.
First a group needs to added with access to reset password for users.
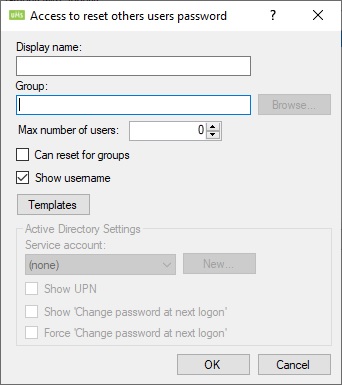
- Enter a saying display name, and browse for an existing AD group.
- Choose a Service Account with access to the domain in which the group is residing (used to resolve members of group).
- Mark the checkboxes if the users is allowed to see extra userinfo.
- For each group it is possible to allow the user to set “Change password at next logon” or to force the setting
Max number of users
This defines how many users can be reset in one request. If user is a member of multiple settings the largest number is used.
if you enter a 0 its means no limit and is therefor seen as the largest number.
Which groups
Next step is to choose the groups that can have their password reset with this module:
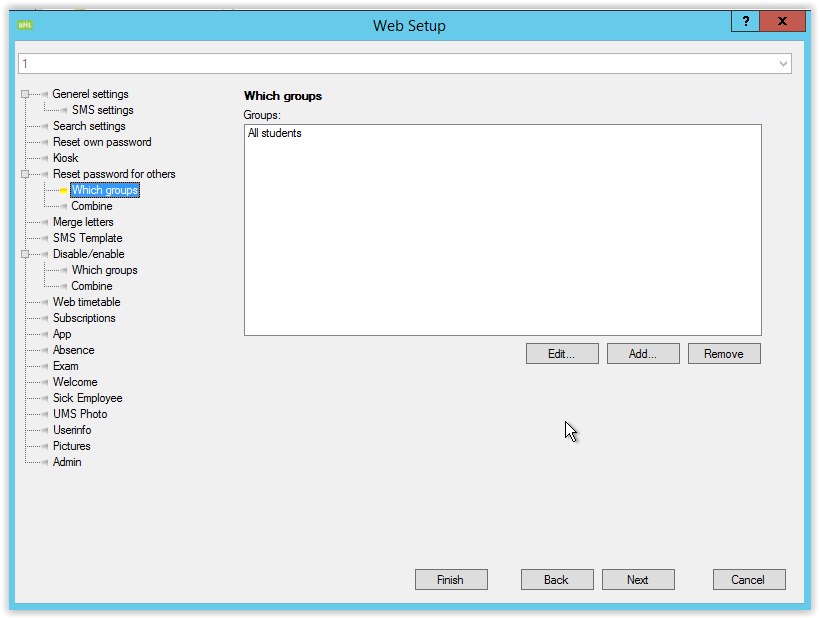
Click “Add…”
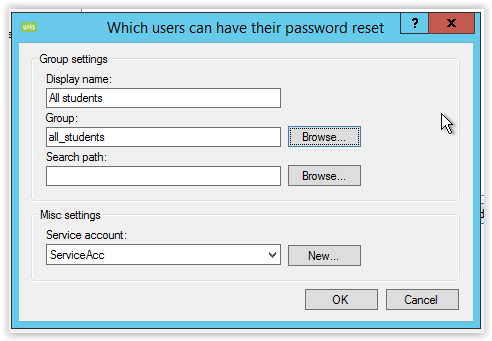
- Enter a saying display name, and browse for an existing AD group.
- Optional an OU search path can be entered. This means that the users both need to be in the group and placed in the “Search path” or below in AD.
- Choose a Service Account with access to the domain in which the group is residing.
Combine groups
The last step is combine the 2 groups:
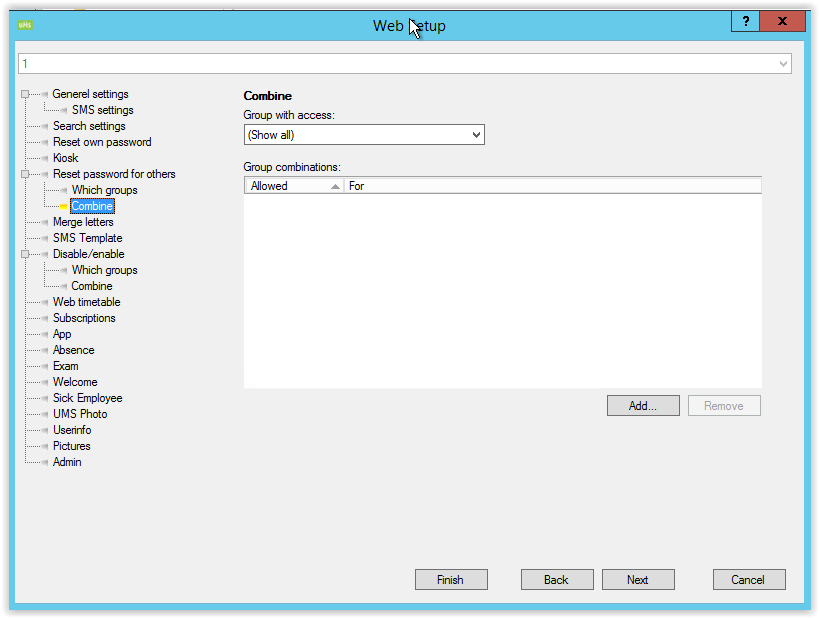
Click “Add…”
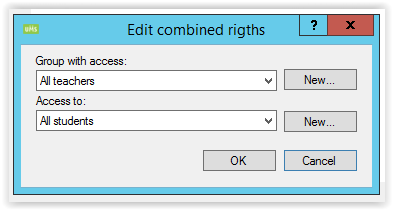
Choose the 2 groups.
Now a basic setting is completed.
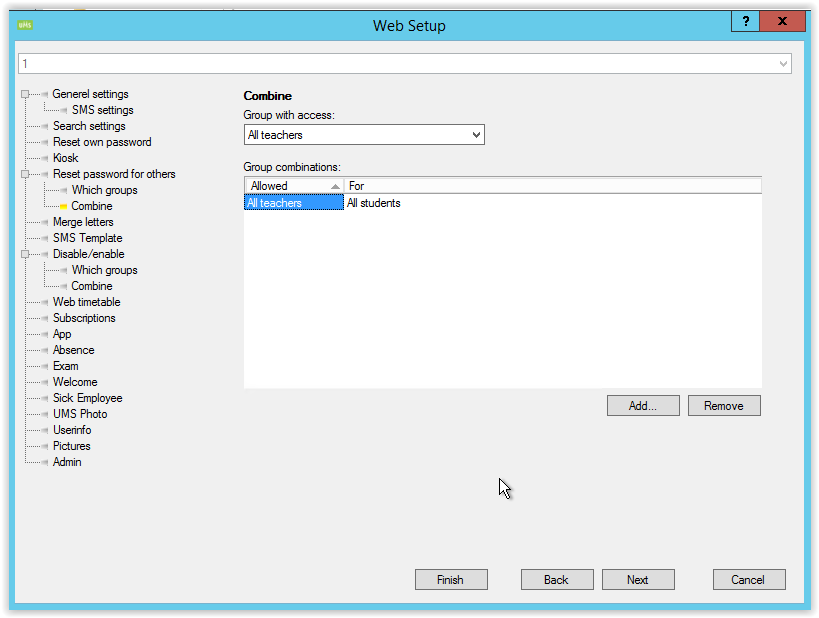
Remember that it’s possible to add a large number af groups if needed, so the needed resulting combined rights is correct.
Typical example:
In the above example, “All teachers” can reset password for “All students”. And “Admins” can reset for both “All students” and “All teachers”.