Guardian Portal: Difference between revisions
Jump to navigation
Jump to search
No edit summary |
Added clause about manual and automatic grouping codes |
||
| (One intermediate revision by one other user not shown) | |||
| Line 1: | Line 1: | ||
The Guardian Portal is a part of [[Attendance Registration Advanced]] | The Guardian Portal is a part of [[Attendance Registration Advanced]] | ||
With this module municipal caseworkers and guardians gain restricted access to student data in UMS such as timetables, absence registrations and grades. | |||
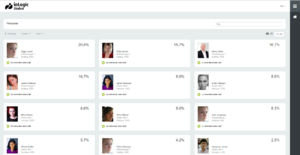
The Guardian Portal makes it easy to monitor selected students and read new information. The list of students can be sorted by absence and student name. | The Guardian Portal makes it easy to monitor selected students and read new information. The list of students can be sorted by absence and student name. | ||
[[File:guardian-student-overview.png|none|thumb]] | [[File:guardian-student-overview.png|none|thumb]] | ||
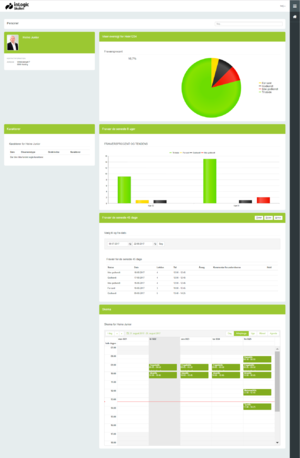
With a single click on a student you gain restricted access to student data in UMS. By default data from the past 45 days is displayed. You can go back in time as long as data exists in UMS. | With a single click on a student you gain restricted access to student data in UMS. By default data from the past 45 days is displayed. You can go back in time as long as data exists in UMS. | ||
[[File:guardian-student-details.png|none|thumb]] | [[File:guardian-student-details.png|none|thumb]] | ||
== Manual and automatically assigned grouping code == | |||
* Manual assigned grouping codes are when you assign grouping codes within the Guardian Portal | |||
* Automatically assigned grouping codes are when the grouping codes comes from the Administrative System | |||
== Prerequisites == | == Prerequisites == | ||
| Line 18: | Line 26: | ||
* Connection to SQL Server port 1433 | * Connection to SQL Server port 1433 | ||
* Connection to SMS Modem port 443 | * Connection to SMS Modem port 443 | ||
== Installation == | |||
* Download [http://downloads.inlogic.dk/Guardian%20Websetup.zip Guardian] | |||
* Install Guardian | |||
* Install the certificate (star certificate recommend) | |||
* Configure IIS redirect in, Guardian must run as https | |||
* Log on på UMS front end server og Configurtator. | |||
* Configure Pap.setup that is found in Configurator > Modules | |||
* Copy the UserManagement.ini into IIS bin folder | |||
* Remember the license | |||
Revision as of 12:27, 19 June 2024
The Guardian Portal is a part of Attendance Registration Advanced With this module municipal caseworkers and guardians gain restricted access to student data in UMS such as timetables, absence registrations and grades. The Guardian Portal makes it easy to monitor selected students and read new information. The list of students can be sorted by absence and student name.

With a single click on a student you gain restricted access to student data in UMS. By default data from the past 45 days is displayed. You can go back in time as long as data exists in UMS.

Manual and automatically assigned grouping code
- Manual assigned grouping codes are when you assign grouping codes within the Guardian Portal
- Automatically assigned grouping codes are when the grouping codes comes from the Administrative System
Prerequisites
- Can be installed on IIS (Internet Information Server) where UMS Academic Web is installed
- If no IIS exists the prerequisites are
- Windows server 2016 or newer
- 1 cpu, 4GB Ram (or more)
- 64GB diskspace (or more)
- Framework .NET 3.5
- Framework .NET 4.6.1
- Microsoft IIS
- A public DNS-address
- Certificate (star certificate recommend)
- Connection to SQL Server port 1433
- Connection to SMS Modem port 443
Installation
- Download Guardian
- Install Guardian
- Install the certificate (star certificate recommend)
- Configure IIS redirect in, Guardian must run as https
- Log on på UMS front end server og Configurtator.
- Configure Pap.setup that is found in Configurator > Modules
- Copy the UserManagement.ini into IIS bin folder
- Remember the license